Custom Rails flash notification with Toastr
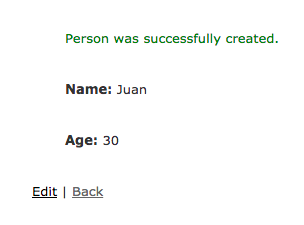
By default, Rails give us some plain flash notification. I’m gonna show you how to get from this:

To this:

Pretty cool uh?.
Lets begin
1.Creating the project
The first thing we need is to create the project, I’m gonna upload this code to Heroku so I need
my database to be Postgresql, the flag -M is to not have mailers files and -T is because we don’t need tests for this app:
rails new custom_flash_notifications -d=postgresql -M -T2.Generating all the MVC part
To keep this simple we are gonna create the model Person with a name and an age, all this is gonna be
created with the magic of scaffold:
rails g scaffold Person name ageThen, create the database and do the migrations:
rake db:create db:migrateFinally, and before running the app, change the routes:
# routes.rb

Rails.application.routes.draw do
  resources :people
  root 'people#index'
end
Now lets create the first person of the list to see the rails default notification:
 Time to do some magic.
3.Adding Toastr to our project
Go to Toastr and download the .zip file or .tar.gz depending of your OS. Once that you have It, open It and copy toastr.min.js and toastr.js.map into app/assets/javascript. Now, if you don’t want to modify the style of the notifications copy toastr.min.css intoapp/assets/stylesheets otherwise use the toastr.css and custom the toasts as you wish.
Time to define our alerts
4.Creating custom flash types
With this you can define all the alerts you want:
add_flash_types :success, :danger, :infoAdd that line in your application_controller
# app/controllers/application_controller.rb

class ApplicationController < ActionController::Base
  protect_from_forgery with: :exception
  add_flash_types :success, :danger, :info
end
Now, go to app/views/layouts/application.html.erb and before the tag <%= yield %> add
<%= render :partial => 'flash_messages', :flash => flash %> like this:
# app/views/layouts/application.html.erb

<!DOCTYPE html>
<html>
  <head>
    <title>CustomFlashNotifications</title>
    <%= csrf_meta_tags %>
    <%= stylesheet_link_tag    'application', media: 'all', 'data-turbolinks-track': 'reload' %>
    <%= javascript_include_tag 'application', 'data-turbolinks-track': 'reload' %>
  </head>
  <body>
    <%= render :partial => 'flash_messages', :flash => flash %>
    <%= yield %>
  </body>
</html>
Lets add that partial.
Create a file with the name _flash_messages.html.erb in a new folder called app/views/application/
and add the following code
# app/views/application/_flash_messages.html.erb

<% if flash.present? %>
  <div id='flash'>
   <script>
     <% if flash[:success] %>
       var $toastContent = $('<span><%= flash[:success] %></span>');
       toastr.success($toastContent)
     <% end %>
     <% if flash[:info] %>
       var $toastContent = $('<span><%= flash[:info] %></span>');
       toastr.info($toastContent)
     <% end %>
     <% if flash[:danger] %>
       var $toastContent = $('<span><%= flash[:danger] %></span>');
       toastr.error($toastContent)
     <% end %>
   </script>
  </div>
<% end %>
Each flash here is one of the flash that we created before.
5.Modifying the controller
Finally, go to app/controllers/people_controller.rb and update your alerts for the ones that we created like this:
# app/controllers/people_controller.rb

...
#Changing notice for success
def create
  @person = Person.new(person_params)
  respond_to do |format|
    if @person.save
      format.html { redirect_to @person, success: 'Person was successfully created.' }
      format.json { render :show, status: :created, location: @person }
    else
      format.html { render :new }
      format.json { render json: @person.errors, status: :unprocessable_entity }
    end
  end
end
#Changing notice for info
def update
  respond_to do |format|
    if @person.update(person_params)
      format.html { redirect_to @person, info: 'Person was successfully updated.' }
      format.json { render :show, status: :ok, location: @person }
    else
      format.html { render :edit }
      format.json { render json: @person.errors, status: :unprocessable_entity }
    end
  end
end
#Changing notice for danger
def destroy
  @person.destroy
  respond_to do |format|
    format.html { redirect_to people_url, danger: 'Person was successfully destroyed.' }
    format.json { head :no_content }
  end
end

...
6.Results
Now, lets try what we did.
Success:

Info:

Danger:

Awesome!.
